8 Easy Spring Air Conditioner Maintenance Steps You Can Do
- April 20, 2017
- Posted by: ATEL Air
- Category: Air Conditioning

 It’s springtime and that means doing yard work and home maintenance. As a part of those chores, you should be thinking about giving your air conditioner a tune up after you’ve finished getting rid of the leftover leaves in your yard.
Now, tune-ups do cost a bit of money when you call in the pros. But you’ll wind up saving more than you spend, though, in the long run.
After you have professional servicing done, your air conditioner will run much more efficiently. Even doing something as simple as changing the air filter (which you can do yourself), you can save five to 15 percent on your energy bill. That’s a huge saving, especially in the country where rates are higher.
You’ll also be less likely to spend money on major repairs during the summer, when your air conditioner is working hard. You could possibly spend hundreds or thousands of dollars, depending on what’s wrong with your AC. In comparison, it usually only costs anywhere from $80 to $100 for a tune-up.
Plus, your air conditioner will last a lot longer if you give it regular fine tuning each spring. That means you buy fewer AC units throughout your life.
So what steps can you take to make sure you do the proper spring air conditioner maintenance? Read on. We’ll first start with the things you can do outside your home, and then move indoors for the rest.
A caveat before we begin: anything that involves doing work to the inside of your air conditioning unit or furnace should be looked at by a professional. If you don’t know what you’re doing, you can damage your system or even get cut by touching moving parts and sharp edges.

1. Take the Cover off the Air Conditioner
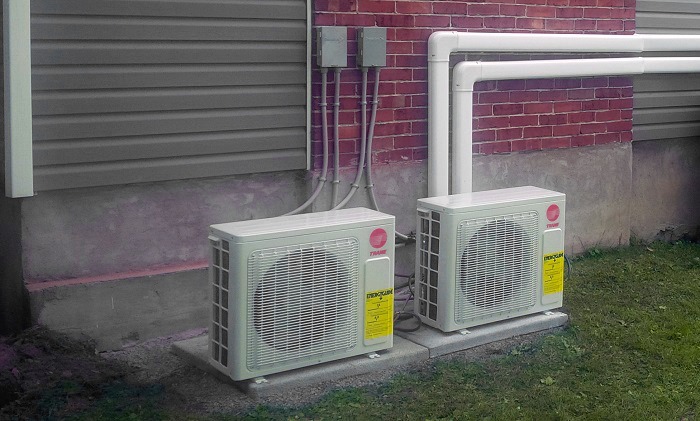
The cover on your air conditioner’s condenser unit outside protects it from the winter elements, but needs to come off in spring. After you do this, take a peek inside the condenser unit to make sure mice and other rural rodents haven’t made a nest there, too.
Rodents love to get inside condenser units during the winter as protection against the cold, and that’s particularly true in the country. Check this before you turn on your AC.
2. Clean Up Around Your Condenser Unit
Clear an area of about 60 centimeters (two or three feet) around the condenser unit to make sure air can flow through it properly and that heat will dissipate effectively. Also remove any dead leaves, grass, branches or other debris from around the condenser unit.
Some sites will tell you to clean the condenser unit’s fins using a paintbrush. We recommend that you actually get professionals to do this, because you can easily bend or damage the fins if you’re not careful. You can do a really gentle wipe of the fins and check to see if they’re bent, though.
3. Check the Insulation on the Refrigerant Line
Make sure the insulation hasn’t worn off the copper refrigerant line from too much time spent baking in the sun.
What is the refrigerant line? It’s the only line that will have insulation on it. It’ll also be the largest of the pipes coming out of your AC. Check the whole line and look at the insulation on the line inside your house when it’s time to go indoors. Replace the insulation if needed. If the insulation is worn, the air won’t be as cool and your air conditioner won’t be running at optimum level.
This is a good time to also check that the other pipes going into your home from the condenser unit don’t have any leaks. If they do, bring in the professionals to have a look and make any repairs.
4. Ensure the Condenser Unit Hasn’t Tilted
Frost is not a good friend to your condenser unit. It can cause the concrete pad underneath the air conditioner to heave and shift the unit. The condenser needs to be absolutely flat to run properly, so be sure to have a look at this.
If the pad isn’t flat, it can lead to the refrigerant line being punctured because of added vibrations to the line. Once the line starts leaking, you’re throwing away money by not having an efficient system. Say hello to higher energy bills.
If the concrete pad has shifted, fix it by placing a long board under one of its ends and packing stone dust underneath it. Repeat this step on the other end to make the pad as level as possible. Lift the pad slowly so that you don’t crack it, and put things back as they were before the frost hit. If the pad breaks apart, get a professional to unhook the AC unit and then install a new pad.
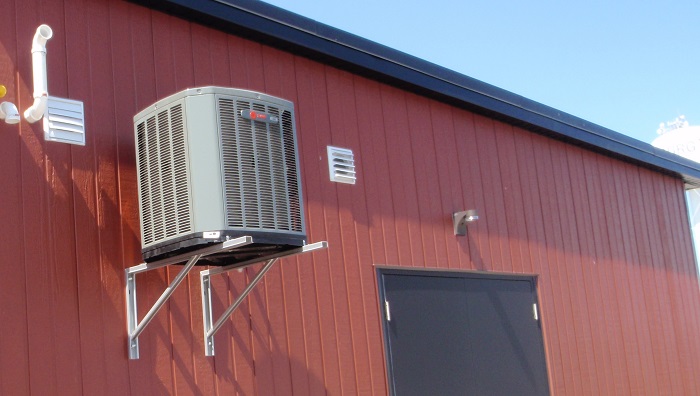
You can also just forget about the pad and have brackets installed on the side of your house. Not only will the air conditioner stay level, you’re guaranteeing proper drainage with this approach. As an added benefit, the unit might not attract as many animals as it would when it was on the ground. Consult an AC specialist for more details.

Now that you have a clean air conditioner and have done your spring checkup outdoors, it’s time to move inside and look at a few things there, too.
5. Change the Furnace Filter
Now that we’re inside, you can replace the furnace filter.
What does this have to do with air conditioning? The air conditioner will use the furnace fan to blow cool air inside your home, so you want to make sure your ducts are as free of dust and dirt as possible. Also, dirty filters will cause ice to form on the unit inside your home — which can lead to leaks.
Start by turning the furnace off. Remove the filter, which will be inside the return air vent, and note the direction of the arrows on the filter. That shows the airflow direction. Draw an arrow on your furnace with a permanent marker so you know in which direction to insert the new filter. Note the size so you know which filter to buy.
If you have a filter with a plastic frame, stop. This is a reusable filter. You can vacuum it and clean it with water outdoors, and reinsert it once it has become completely dry.
With the new replaceable filter, look for marks that show you which side of the filter should face the furnace. Slide the filter back into place and cover it. Make sure that it’s packed in snugly, so dirty air can’t escape around it and get into your ventilation system. Replace your filter every month during the cooling season.
6. Check for Drips
There are a couple of other main reasons why your air conditioning system may have a leak, besides having a dirty filter.
You could have a crack or a hole in an overflow drain pain, which is directly below the evaporator coil unit. Use a flashlight and check the pan, which catches condensation, for damage. Look at each corner of the pan, along the outside edges and directly above the wettest spot.
The main cause of most AC leaks is a stopped-up condensate line. This line drains condensation from the overflow pan to the outside or straight into a drainpipe. When this line gets clogged up, water backs up into the overflow pan. If this is happening, it’s time to bring in a professional.
7. Turn the Dehumidifier On
While your air conditioner will dehumidify the air, that’s not what it’s primary purpose is. If you have a humidifier in your heating and cooling system, it’s time to turn that off and start running the dehumidifier.
Why? Too much humidity in the air can cause mould and mildew to form in your home, which may lead to health problems, especially if you suffer from allergies. Once you get to 60 percent humidity, mould, fungi, and dust mites can grow. So if you want your air to be as cool and fresh as possible — and avoid health risks — make sure that your dehumidifier is running smoothly.
If you don’t have a dehumidifier, you should consider investing in one. All basements should have it just to keep you comfortable and healthy.
8. Close All Dampers to the Basement
In the summer, you’ll want to walk around your basement and close your dampers so that you’re driving cool air into the upper part of your home.
Most homes have manual dampers, which are plate-shaped devices inside your ducts that control airflow. The dampers are usually found where the duct system branches into two. Manual dampers usually have a lever that you can turn by hand.
Some may have a rod that is turned with a screwdriver. You’ll probably have to loosen a wing-nut on them to allow the handle to be turned. Once you have the damper shut, the wing nut will need to be tightened to keep everything in place.
Give Your Air Conditioner a Professional Tune-Up
Now that you’ve gone through your air conditioner spring checkup, you can call in the professionals to take care of the things that you can’t or shouldn’t do without professional training.
If you get this done in early spring, you’ll get the best possible efficiency – and savings – all summer long. Once the daytime temperature reaches 13°C (56°F) we can do a proper check of your refrigerant levels and all internal components.
ATEL Air does comprehensive professional air conditioner maintenance, and will provide you with a written report to keep.


